|
By Dave and Mary
As an Amazon Associate we earn from qualifying purchases.
If you make a purchase through affiliate links on our site, we earn a commission at no cost to you.
See our disclosure policy.
Assemble This Wild Bird Feeding Station
With Plumbing Pipe Fixtures to
Easily Hold Multiple Feeders
Mary and I built this wild bird feeding station because we enjoy feeding and watching the wild bird activity at our feeders from the front porch.
It only makes sense; you are outside to enjoy what nature has to offer.
Why not integrate a bird feeding station into your back or front yard landscaping.
Having had many bird feeding stations over the years I've learned quite a bit about feeding birds and keeping the squirrels away.
My advice is: height and barriers. I've incorporated both in my latest feeding station.

You can easily configure this bird feeding station with ample space for all of your feeders and at different levels.
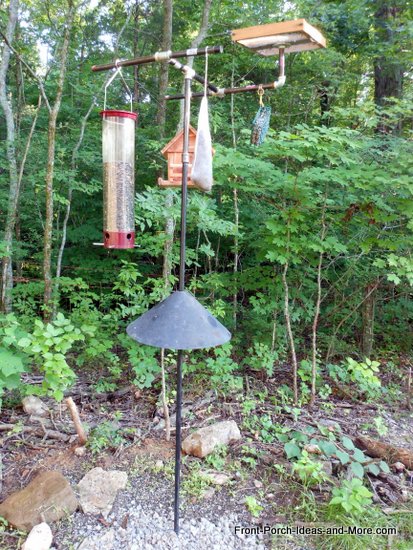
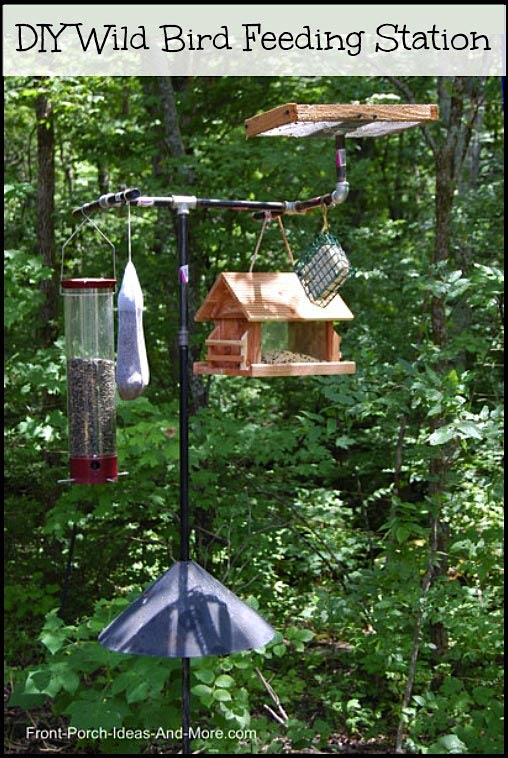
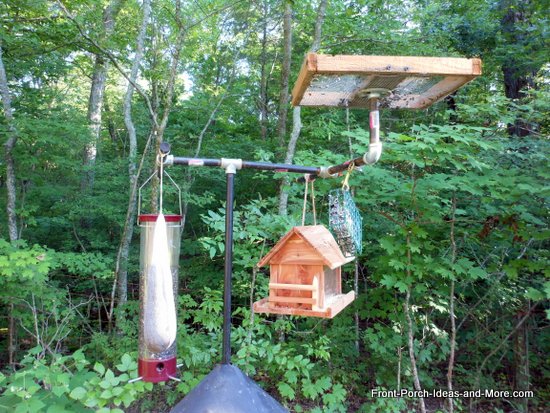
I've configured mine to hold a flat feeder, a suet holder, a small bird feeder, thistle seed feeder, and song bird feeder.
I can also easily add space to hang hummingbird feeders, fruit or fruit jelly cups, or a meal worm holder.
This feeder easily accommodates additional lengths of pipe to create more levels for more feeders.
And the best part is it won't bend under the weight of the feeders like most Shepard's hooks.
It can even be constructed with heavier pipe to handle the very heaviest of feeders without tipping or bending.
Watch Our Bird Feeding Station Video
Listen as Dave tells how we constructed our feeding station
Wild Bird Feeding Station Assembly Instructions
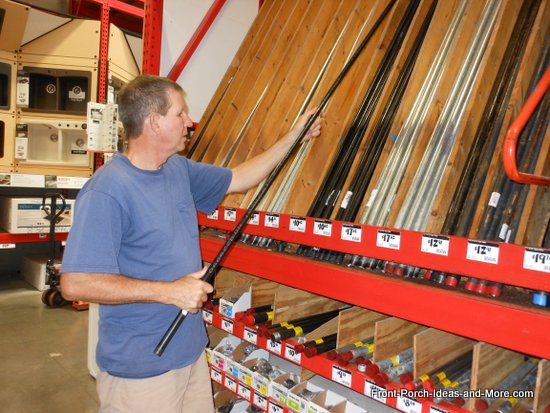
I use to use a treated 4x4 as the base for my feeders but now use black plumbing pipe.
Although a little more expensive than wood it gives me more options and lasts forever.
Because it is black and relatively small in diameter (I use 1/2" pipe) itis does not become an intrusive feature in the yard.
Even if you use 3/4 inch pipe, it still won't detract from your landscaping.
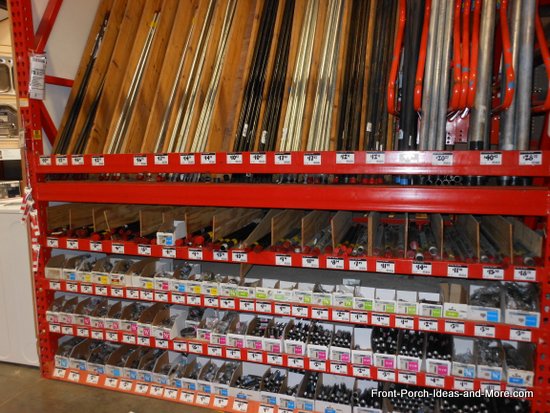
You can find black plumbing pipe in the plumbing department at Home Depot, Lowes, and other home supply stores.

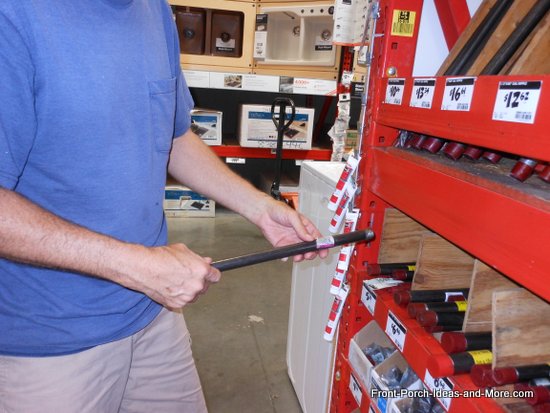
I chose a 10 foot long piece (threaded at both ends)

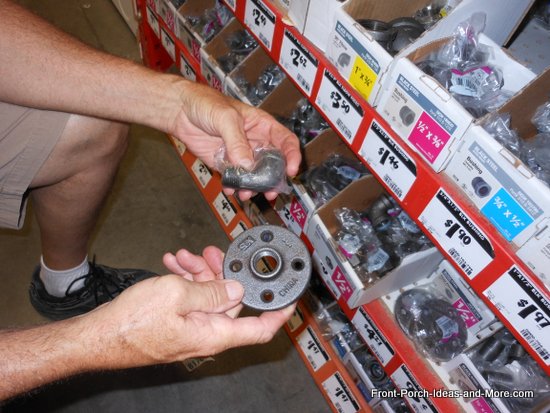
Along with the pipe, you will also need other pipe fixtures depending on your own design.
For mine, I chose an assortment of fixtures along with a flange for my flat open feeder.

You will also need different lengths of shorter pipes (all threaded) on which to attach your feeders.

To build my feeding station I selected a suitable location.
I then dug a hole (base your depth on your local frost line).
Ours is about 16 inches.
Based on that measurement, I cut my 10 foot section down to 8 feet (which I later had to extend - more on that later).
I placed the pipe in the hole and poured concrete around it.
I squared the pole and secured it so it remained straight while the concrete dried.
When dry, I then assembled my feeding station using the shorter pieces of pipe and fixtures.
I recommend laying it out first on the ground so you can see what it will look like and to ensure there is sufficient spacing between feeders.

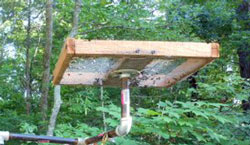
 I made a flat feeder from scrap lumber and screening material.
Many larger birds (and some smaller ones too) like to feed on open feeders.
I used the flange to attach the feeder to the pipe.
Video: Dave and His Bird Feeding Station
Please watch our short video to see how I made the flat feeder.
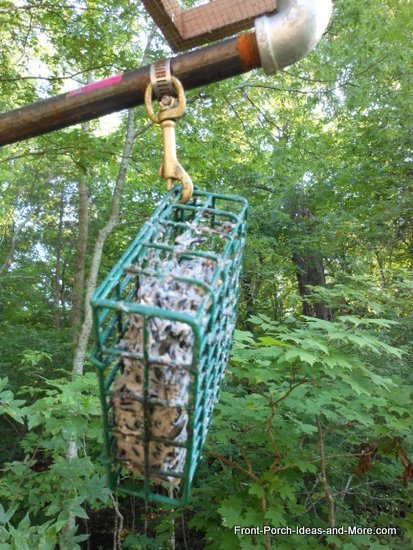
To hang the suet feeder, I used a hose clamp and snap swivel.
Secure the swivel to the pipe with the clamp.
Snap the swivel to the suet feeder - works great.

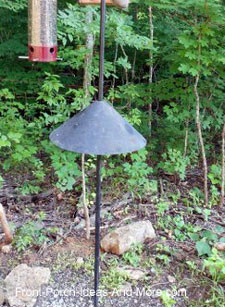
 I use a baffle to ward off squirrels.
It works well as long as they are of a sufficient height from the ground.
I supported the baffle on the pipe with a homemade clamp.
I made the clamp by drilling a 7/8 inch hole in a piece of scrap wood to fit around my pipe.
I then drilled a hole on each side of the wood block to accept bolts and nuts.
I then cut the assembly in half and reassembled it around the pipe.
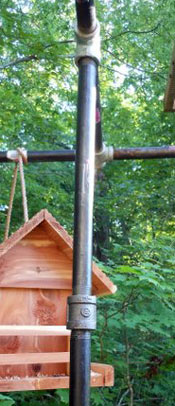
 I quickly discovered that I had not allowed sufficient height for the feeding station.
The squirrels could jump up on the feeders.
Simple solution - extend the main pipe.
I used a coupler and a 12 inch extension to raise the feeding assembly.
Problem solved.

Finished wild bird feeding station
We really enjoy our bird feeding station and watching the squirrels trying to find a way to the feed.
So far the score is: Dave - 1, Squirrels - 0

Our front porch is the perfect place from which to enjoy our feeding station
Let us know if you have any questions regarding our wild bird feeding station; we'd be glad to assist.
Share Your Wild Bird Feeding Station
Send us photos of your bird feeding station and feeding tips
so we can share them with others on our site.
Bonus: Dave's Wild Bird Feeding Station Gadget
To inhibit squirrels from eating all the seeds, I positioned the flat feeder quite high on the feeding station.
This prevents them from jumping over the barrier and onto the feeder.
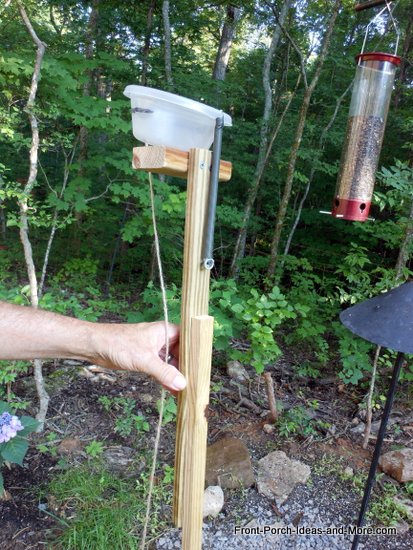
However, I'm slightly height impaired so reaching the top platform feeder is a stretch.
On top of that, our grand kids like to help me feed the birds and cannot reach the top feeder.
Here's a gadget I made that you might find useful if faced with the same situation - and perhaps you already saw it in our video above.

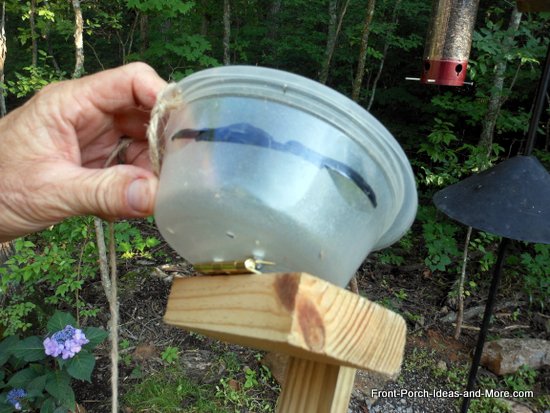
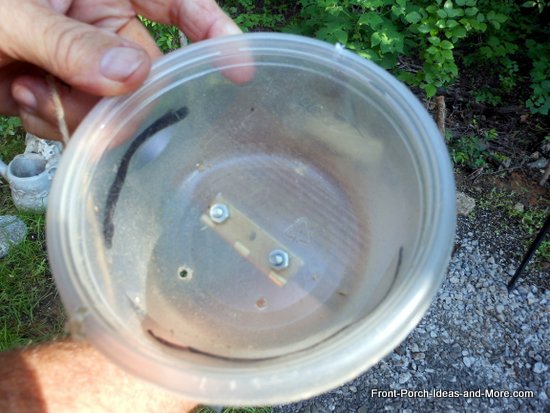
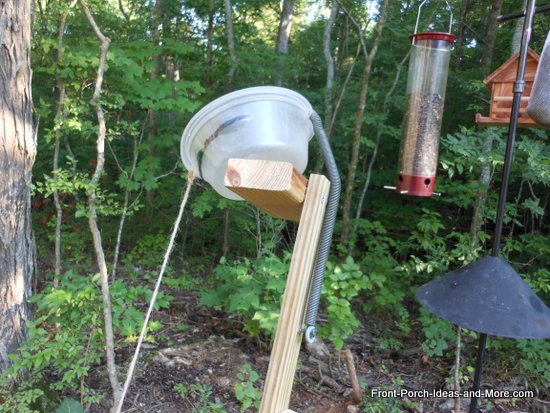
All you need is a spring, a plastic container, a small hinge, one screw, two small bolts and nuts, some scrap wood and a string.
Attach your container to a small block of wood with the hinge as shown below.


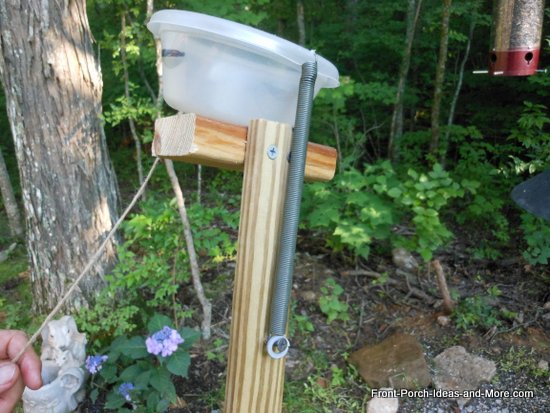
Attach the small block of wood to another piece (the handle)with a screw.
Make the handle long enough to easily reach your platform feeder.

Handle attached to small block of wood
Attach the spring to the container and handle as shown below.

Spring attached to container and handle
Attach a string/cord to the front of the container as shown.

Spring attached to container and handle
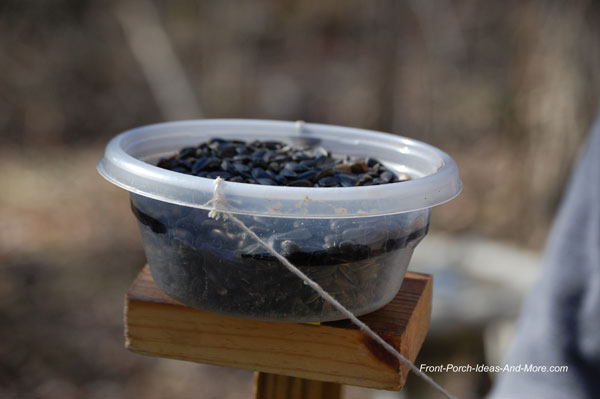
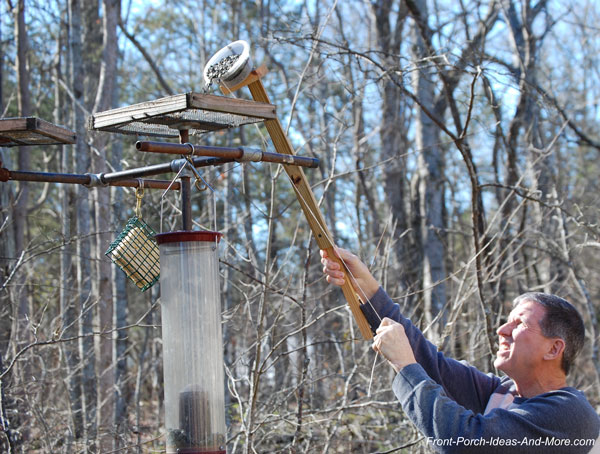
To operate, fill the container with seed. Raise above your platform feeder.
Pull string to empty container onto platform.

Fill cup with your seed of choice

Position over feeder and pull cord
Let us know about your wild bird feeding station experiences; we'd love to hear about them.
A Solution to a Frozen Birdbath

Dave and I like to give birds fresh water year round in our bird bath.
Want to know how we keep the water heated?
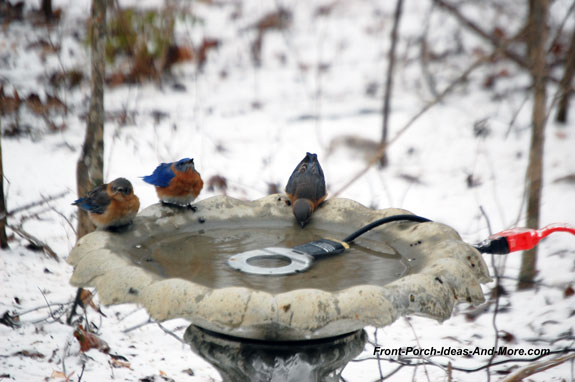
We have tried several bird bath "heaters" over the years but we like the one you see here the most.
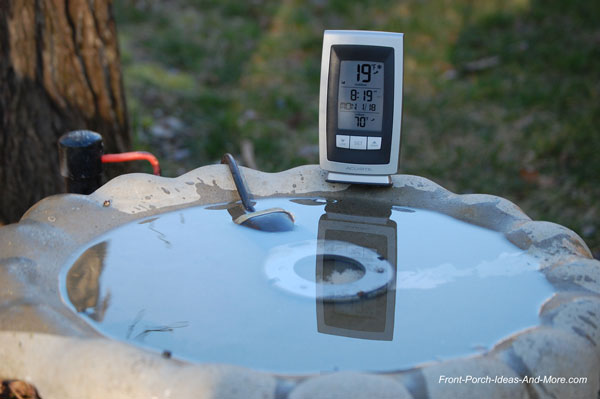
This bird bath heater has a thermostat and it only turns on when the temperature dips to around 35 degrees.
We get beautiful bluebirds visiting us because they love having fresh water to drink.

Temp at 19 degrees

We found this heater on Amazon (Amazon affiliate link)
Watch Our Video About Keeping Birds Happy in the Winter
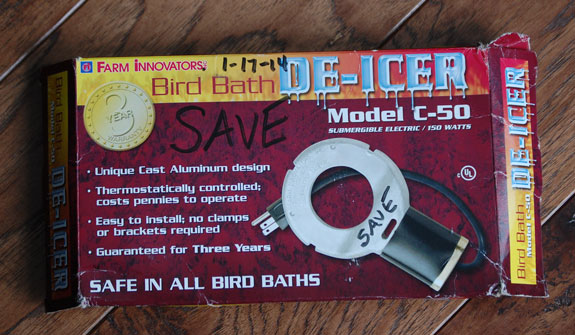
What Mary and I like about this birdbath de-icer (Amazon affiliate link) is
that it's been reliable and has a 3-year warranty (hence why I wrote "save" on the box).
The mechanism does not seem to bother the birds in the least.
The only downside to it, and this is minor, is that the water evaporates more quickly than without the heater.
So you need to fill the birdbath more frequently.
We have enjoyed our wild bird feeding station immensely and with the addition of the bird bath heater, we are seeing more types of birds visit us in the winter.
We live in TN so generally our winters are mild, but this year we experienced an ice storm and can attest to the effectiveness of this heater.
So far, it's been a great purchase in our opinion. If you're into backyard birding, we recommend this product from our personal experience.

Hi! We're Mary and Dave, lifelong DIYers, high school sweethearts, and we both love porches.
You've come to the right place for thousands of porch ideas.
Our Sponsors


End Sponsors
|

Hi! We're Mary and Dave, lifelong DIYers, high school sweethearts, and we both love porches.
You've come to the right place for thousands of porch ideas.
--- Cute Mushroom Mug ---

Wouldn't this be an adorable mug for your porch?
It's for sale in my Etsy shop!
--- Our Wonderful Sponsors ---


--- End Sponsors ---
Our Newsletter, Front Porch Appeal
Learn more!
Thank you for being here!
|
 Front Lawn Landscaping Ideas
 DIY Garden Bench
 Lawn Drainage Problem Solved





 I made a flat feeder from scrap lumber and screening material.
Many larger birds (and some smaller ones too) like to feed on open feeders.
I used the flange to attach the feeder to the pipe.
 I use a baffle to ward off squirrels.
It works well as long as they are of a sufficient height from the ground.
I supported the baffle on the pipe with a homemade clamp.
 I quickly discovered that I had not allowed sufficient height for the feeding station.
The squirrels could jump up on the feeders.
